If you want to change the look of your kitchen without a complete kitchen renovation, rebuilding old kitchen cabinets is perfect for you. It is budget-friendly, rewarding, and a fun DIY project. Kitchen cabinets can become shiny, damaged, or lose their style over a period of time. So instead of replacing them, why not refurbish them and give them more time to shine? Many kitchen remodeling experts say updating your cabinets is the perfect remodeling project. It changes the feel of the space and saves you a ton of cash.
In this guide, we’ll explain how to rebuild old kitchen cabinets step by step, and relocate your kitchen with cabinet make-over ideas and tips. Whether you are remodeling your kitchen by changing the hardware or simply refinishing old cabinets with paint, we will help you achieve an amazing new kitchen while saving money.
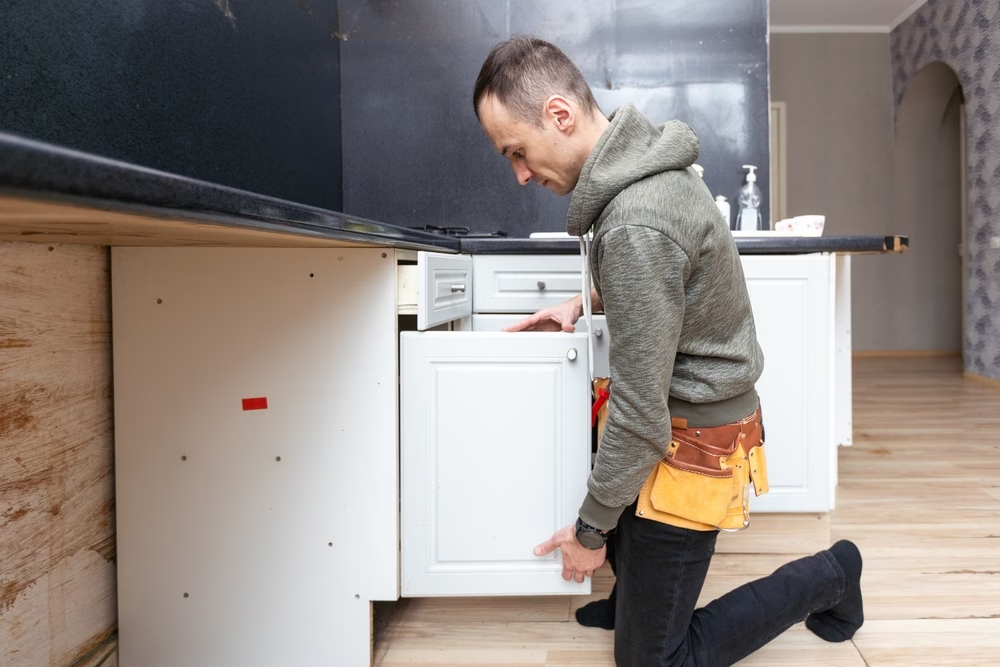
Step 1. Determine the Condition of Your Cabinets
Prior to moving on to the cabinet make-over, determine the cabinet’s condition. Are they structurally unsound, or are the woods and the cabinets themselves still enough, or are there signs of damage or decay? Slightly worn cabinets that are functional should still allow the cabinet face to modernize. If the frames face damage, the wood is rotting, or replacement is warranted, contact a professional. Cabinets that are functional and aesthetically outdated should allow you to face the wood, paint, or stain.
For cabinets that only need a simple makeover, consider the following:
- Scratches and dents: These can often be repaired with wood lacquer or sanding.
- Loose hinges or hardware: The replacement of worn hardware can often give your cabinets a fresh and improved appearance.
- Outdated finish: A new paint or stain can be a dramatic transformation.
Step 2: Take Off the Doors and Hardware
After evaluating the cabinets and deciding how you want to redo them, the real work begins. Take off the cabinet doors, drawers, and the removable pieces of hardware. To do this, use a screwdriver or drill to unfasten hinges, knobs, and handles. If you want to replace the hardware, i.e., knobs and handles, pay attention to the sizes and placements of screw holes in old hardware. This will save you a lot of time in securing the new hardware.
Put the doors and drawers to the side for now; you will work on them separately later. Removing everything will allow you to access the frames of the cabinets and work on them more efficiently.
Step 3: Wash the Surfaces
Before you do anything, it’s a good idea to clean cabinets. A lot of old, greasy dust and grime builds up on kitchen cabinets, especially around the handles and the edges. To remove it, you can use a mop or a cloth soaked in a mixture of warm water and mild detergent or a degreaser. When you do this, make sure to clean in the corners and cracks, as this is usually where the dirt builds up.
For hard, greasy marks, consider stronger cleaning products like TSP (trisodium phosphate). It works wonderfully for built-up kitchen grime. After cleaning, allow the surfaces to air dry completely before proceeding.
Step 4: Repair and Sand the Cabinets
This will be the most appropriate moment to repair the scratches, dents and other surface defects in your cabinet. Wood filler can be used in filling cracks and holes. Dry the piece, as suggested. Then, wipe the piece using medium sandpaper to flatten the repaired parts.
To achieve a smoother result, be certain to fine sand after your initial sand roughing. “Sanding” creates an anchor for the paint, stain, and surface, so it is much more durable.
Step 5: Prime the Cabinets
Most important is probably the priming step before refinishing cabinets. Primers promote surface agreement, and so do paint sticks. They also eliminate bleed-through and offer more control.
For the best results, especially with cabinets that have a gloss finish, choose a high-quality oil-based or bonding primer. Apply the primer smoothly with a brush or roller, then let it dry thoroughly. After this, you can then proceed with painting or staining.
Step 6: Paint or Stain Your Cabinets
After the primer has dried, it’s time to paint or stain the cabinets. A modern, clean look can be achieved by painting the cabinets a new color. However, for a more traditional, rustic look, the cabinets can be stained to highlight the wood’s natural grain and texture.
Painting
For painting, use durable, quality kitchen cabinet paint that withstands moisture. It’s well-known that semi-gloss and satin finishes work best for kitchen cabinets since they are easy to clean.
To prevent drips and streaks, each coat should be applied evenly and without brush overloading. The paint should be applied in thin, even layers and allowed to dry thoroughly before each additional coat. It’s advisable to use at least two coats for the best results. For a more professional finish, use a sprayer to get an even smoother coat.
Staining
- When selecting a wood stain, choose one that matches the colors in your kitchen. To apply the stain, use a clean cloth and work in small sections.
- After applying the stain in a section, wait a few minutes, then use a clean cloth to remove any excess stain. You can repeat the staining process until you reach your goal.
- When the stain is done drying, put a clear polyurethane finish to seal in the moisture and protect the surface from everyday damage.
Step 7: Refinish the Cabinet Doors and Drawers
As the frames dry, you can shift your attention to the doors and drawers. For staining, apply the stain and finish like you did for the cabinet boxes. For drawers and cabinet doors, you can add new hardware for a more updated look. New knobs, handles, or pulls can complete the look that you want for your cabinets. Make sure the new finish matches the hardware you choose, whether it’s modern or vintage.
Step 8: Install the Doors, Drawers, and Hardware
Now that everything has dried, it’s time to reassemble your cabinets. Doors and drawers reattached to the frames. Take care that the doors are positioned to fold and unfold without obstruction. Scrutinise the hinges to determine where adjustments are needed and screws to determine where the loosest screws are, so everything can be aligned.
After that, fix the new hardware on the drawers and doors. This small change can massively influence the appearance and ease of use of your cabinets. For a kitchen that is on the modern spectrum, go for hardware that is modern, and for kitchens that fall on the traditional spectrum, opt for classic knobs.
Step 9: Final Touches
Inspect your cabinets for a final time to wrap up your cabinet makeover. Ensure everything is in its place and correct any final spots that remaining paint or stain may have created. Remove all remaining dust and debris, take a moment, and enjoy the new kitchen cabinets.
Additional Tips for Updating Kitchen Cabinets on a Budget:
- Instead of replacing cabinet doors entirely, just paint them.
- New hardware gives cabinets a modern touch without the expense of new cabinetry.
- Use cost-effective materials like MDF for painted finishes and plywood for cabinet boxes.
- DIY cabinet makeover concepts include open shelving, and for a rustic feel, you can also repurpose old wood.
Conclusion
Rebuilding your old kitchen cabinets is a wonderful way to refresh your kitchen with little monetary investment. Following the steps and making the right updates, you can achieve a stylish, functional kitchen that looks brand new. Whether you choose to refinish old cabinets or a full cabinet makeover, the process is a rewarding experience. If you need expert help for your project, kitchen remodeling professionals are available to guide you or take over the work.
Want to transform your kitchen? Plan your kitchen upgrade with the professionals’ help today!
FAQs About Refurbished Kitchen Cabinets
How long does it take to rebuild old kitchen cabinets?
Depending on your project’s scale, rebuilding old kitchen cabinets can take anywhere from a weekend to a couple of weeks, depending on the amount of sanding, painting, and refinishing.
Can I rebuild kitchen cabinets without removing them?
Yes, you can refurbish kitchen cabinets without removing them entirely. You can give them a new look by sanding, priming, and painting the cabinets while still installed.
What are the best materials for kitchen cabinets?
For a long-lasting finish, use hardwoods like oak or maple for doors and plywood for cabinet boxes. MDF and particleboard are also good painted finish materials if you’re on a budget.
Can I update my kitchen cabinets without painting them?
Indeed, you can update the cabinets without the need to paint them by refinishing them with a wood stain, modifying the cabinetry hardware, or swapping the doors out for a new configuration.